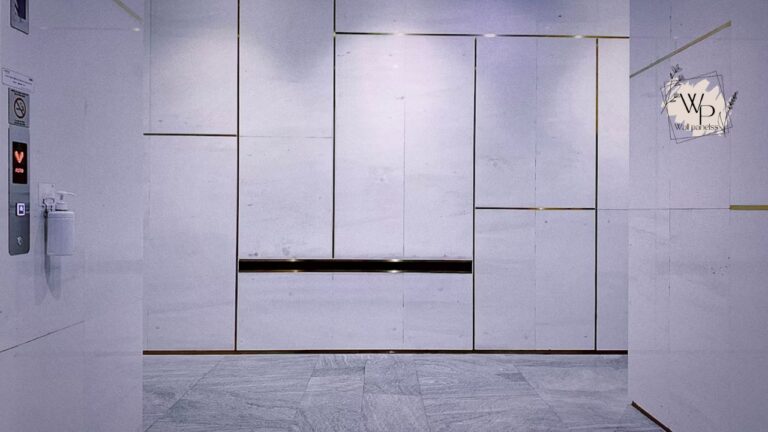
Are you tired of scrubbing grout lines and dealing with moldy tiles? If you’re planning a bathroom remodel, exploring alternatives to traditional tile is a smart move. Modern acrylic shower wall panels offer a sleek, low-maintenance, and surprisingly affordable solution that can completely transform your space.
These panels provide a seamless, waterproof barrier that’s not only practical but also stunningly beautiful. Forget the outdated, flimsy surrounds of the past; today’s acrylic options are durable, stylish, and built to last.
Quick Look: Acrylic Shower Wall Panels at a Glance
Before we dive deep, here’s a quick summary of what makes acrylic shower wall panels a fantastic choice for modern bathrooms.
| Feature | Description | Key Advantage |
|---|---|---|
| Material | High-grade, non-porous acrylic | 100% waterproof, resistant to mold, mildew, and stains. |
| Appearance | Seamless, high-gloss or matte finishes | Creates a clean, modern, and spacious look. No grout lines. |
| Durability | Scratch and impact-resistant | Withstands daily wear and tear better than many alternatives. |
| Installation | Direct-to-stud or glue-up application | Faster and less messy installation compared to tile. |
| Maintenance | Extremely low-maintenance | Simple wipe-down with a soft cloth and mild cleaner. |
| Cost | Mid-range price point | More affordable than high-end tile projects, offering great value. |
Why Choose Acrylic Shower Wall Panels? The Amazing Benefits
When it comes to bathroom renovations, the choices can feel overwhelming. Let’s break down the incredible advantages of acrylic shower wall panels and see why they have become a favorite for homeowners and designers alike.
Say Goodbye to Grout Forever
One of the most frustrating aspects of a tiled shower is the endless battle with grout. Grout is porous, meaning it absorbs moisture, soap scum, and bacteria. This leads to discoloration, cracking, and the dreaded growth of mold and mildew.
With acrylic shower wall panels, you get a completely seamless and non-porous surface. There are no grout lines to scrub, bleach, or re-seal. Imagine a shower that looks brand new with just a simple wipe-down. This single benefit saves you countless hours of cleaning and eliminates a major source of bathroom maintenance headaches.
Unbeatable Durability and Longevity
High-quality acrylic is a remarkably tough material. It’s built to withstand the rigors of a busy household, resisting chips, cracks, and scratches far better than tile or fiberglass. The color and finish are integrated throughout the material, so even if a deep scratch were to occur, it would be much less noticeable than a chip in a ceramic tile’s glaze.
These panels are also UV-resistant, meaning they won’t fade or turn yellow over time, even with exposure to sunlight. A well-installed acrylic shower system can easily last for decades, looking just as brilliant as the day it was installed.
A Truly Waterproof Solution
Water damage is a homeowner’s worst nightmare. A tiled shower has thousands of potential failure points—the grout lines. Even with proper sealing, grout can degrade over time, allowing moisture to seep behind the tiles and into your walls. This can lead to catastrophic structural damage and mold problems.
Acrylic shower wall panels offer a superior level of protection. The large, solid sheets create an impenetrable barrier. When installed correctly with a quality sealant at the seams and edges, your shower becomes a completely waterproof enclosure, giving you total peace of mind.
Lightning-Fast Installation
A traditional tile shower installation is a long, messy, and labor-intensive process. It can take a professional several days, involving steps like applying backer board, waterproofing, setting tiles, waiting for mortar to cure, grouting, and finally sealing.
In contrast, acrylic shower wall panels can often be installed in a single day. The panels can be cut to size on-site and glued directly to waterproof drywall or even, in some cases, over existing tile. This drastically reduces labor costs and means you get your bathroom back much faster. For the avid DIYer, it’s a far more manageable project than tiling.
Stunning and Versatile Designs
Modern acrylic panels are anything but boring. They come in a breathtaking array of colors, patterns, and finishes.
- High-Gloss Solids: Choose from classic white, black, or contemporary grays for a sleek, minimalist look.
- Stone Patterns: Get the luxurious appearance of marble, granite, or travertine without the cost and maintenance. The high-resolution patterns are incredibly realistic.
- Textured Finishes: Some panels feature subtle textures or matte finishes for a more organic and spa-like feel.
This versatility allows you to achieve virtually any design aesthetic, from ultra-modern to timelessly classic.
What Real Homeowners Are Saying: Reviews and Experiences
It’s one thing to read about features, but it’s another to hear from people who live with acrylic shower wall panels every day. The feedback is overwhelmingly positive, with homeowners frequently expressing sheer delight and relief.
Review: The Grout-Free Dream
“I’ll be honest, I was skeptical. I thought it might look cheap. I was so wrong. We chose a Calcutta marble-style panel, and it’s absolutely stunning. My friends think it’s real stone. The best part? I’ve spent a total of 5 minutes cleaning it this month. I’ll never go back to tile. Best decision we made in our whole remodel.” – Jessica L., Rated 5/5 Stars
Review: A DIY Victory
“My husband and I installed the acrylic shower wall panels ourselves over a weekend. The videos from the manufacturer were super helpful. Cutting the panels was the scariest part, but we took our time and it worked out perfectly. It saved us thousands in labor costs, and the result is so professional. We feel like pros!” – Mark and Sarah P., Rated 5/5 Stars
Review: From Dingy to Dazzling
“Our old fiberglass shower was cracked and yellowing. It was embarrassing. We had a company install a new acrylic system in one day. ONE DAY! It completely changed the feel of our small bathroom, making it look brighter and bigger. It’s incredibly easy to keep clean, which is a huge plus with two messy kids.” – David R., Rated 4.5/5 Stars
These stories highlight the key themes: beauty, ease of maintenance, and value. The “wow” factor combined with the practical, time-saving benefits makes acrylic shower wall panels a home run for many.
Step-by-Step Installation Guide
While professional installation is always recommended for a perfect, warranty-backed result, a skilled DIYer can successfully install acrylic shower wall panels. It’s crucial to follow the manufacturer’s instructions to the letter, as steps can vary.
Here is a general overview of the process.
Disclaimer: This is a simplified guide. Always consult the specific instructions for the product you purchase.
Step 1: Preparation is Everything
This is the most critical stage. The walls must be clean, dry, and structurally sound.
- For New Construction: Install moisture-resistant drywall (green board or cement board). Make sure the walls are perfectly plumb and flat.
- For Remodels: Remove the old shower surround, tile, or faucet. Inspect the studs for any water damage or rot and replace as needed. Install new, appropriate backer board.
- Over-Tile Installation: Some thin acrylic shower wall panels can be installed over existing tile, but only if the tile is in excellent, flat condition with no loose pieces. The tile must be thoroughly cleaned and de-glossed.
Step 2: Measuring and Dry Fitting
“Measure twice, cut once” is the mantra here.
- Carefully measure the dimensions of your shower alcove. Account for the location of the faucet, shower head, and any other fixtures.
- Transfer these measurements to the acrylic panels. Use a protective film or painter’s tape on the cutting line to prevent chipping.
- Place the panels in the shower alcove without adhesive to ensure a perfect fit. This is your “dry fit.” Make any necessary adjustments now.
Step 3: Cutting the Panels
Cutting acrylic shower wall panels requires a steady hand and the right tools.
- Use a circular saw with a fine-toothed blade designed for acrylic or plastics, or a jigsaw for curves.
- Cut with the finished side facing down to minimize the risk of scratching.
- Use a hole saw to cut openings for the plumbing fixtures. Sand the cut edges lightly for a smooth finish.
Step 4: Applying the Adhesive
Once you’re confident in the fit, it’s time for adhesive.
- Use the manufacturer-recommended adhesive. Using the wrong type can damage the panels or fail to bond properly.
- Apply the adhesive to the back of the panel in a grid-like pattern, typically with lines of adhesive every 4-6 inches. Also, apply a bead around the entire perimeter.
Step-5: Setting the Panels
This step moves quickly.
- Carefully press the back panel into place first. Apply firm, even pressure across the entire surface to ensure a strong bond.
- Install the side panels, ensuring they fit snugly into the corners. Some systems have interlocking corners, while others require a bead of sealant.
- Use bracing (like 2x4s wedged against the opposite wall) to hold the panels firmly in place while the adhesive cures. Curing time can be up to 24 hours.
Step 6: Sealing the Seams
Waterproofing is the final, crucial step.
- Once the adhesive is fully cured, apply a 100% silicone sealant to all seams: the corners, along the top of the shower pan or tub, and around the plumbing fixtures.
- Use a high-quality, kitchen-and-bath-grade sealant that is mold-resistant.
- Smooth the bead of sealant with a wet finger or a sealant-smoothing tool for a clean, professional line.
Keeping Your Shower Sparkling: Maintenance Tips
Maintaining your acrylic shower wall panels is incredibly simple.
- Daily: After your shower, use a squeegee to wipe down the walls. This takes 30 seconds and dramatically reduces water spots and soap buildup.
- Weekly: Wipe the panels with a soft cloth and a gentle, non-abrasive cleaner. A solution of mild dish soap and warm water or equal parts water and white vinegar works perfectly.
- What to Avoid: Never use abrasive cleaners (like Comet or Ajax), scouring pads, or harsh chemicals (like bleach or ammonia). These can dull the glossy finish and damage the surface of the acrylic shower wall panels.
That’s it. No scrubbing, no harsh fumes, no back-breaking labor.
Cost Analysis: Acrylic vs. Tile
When budgeting for a bathroom remodel, it’s essential to look at the total cost, not just the price of materials. This is where acrylic shower wall panels truly shine.
| Cost Component | Tiled Shower (Mid-Range) | Acrylic Shower Wall Panels | Notes |
|---|---|---|---|
| Materials | $8 – $25 per sq. ft. | $30 – $60 per sq. ft. | Acrylic material cost is higher, but this is only part of the story. |
| Labor/Installation | $1,500 – $4,000+ | $500 – $1,500 | Installation for tile is far more complex and time-consuming. |
| Installation Time | 3 – 5 days | 1 day | Less disruption to your home and life. |
| Long-Term Maintenance | Regular sealing ($50/yr), Grout repair | Minimal (cost of cleaner) | Time is money. The hours spent scrubbing grout have value. |
| Estimated Total | $4,000 – $10,000+ | $2,500 – $6,000 | Acrylic shower wall panels offer significant savings on the total project. |
While the initial material cost for acrylic shower wall panels might be higher than for basic ceramic tile, the massive savings on labor and the elimination of future maintenance costs make them a more economical choice in the long run. When you factor in the value of your time and the peace of mind that comes with a grout-free, waterproof system, the value proposition is undeniable.
FAQs: Your Questions About Acrylic Panels Answered
Here are some of the most common questions we hear about acrylic shower wall panels.
Q: Do acrylic shower walls look cheap or like plastic?
A: Not at all. This is a common misconception based on old, thin fiberglass units. High-quality, modern acrylic shower wall panels are thick, solid, and have a depth of color and finish that rivals stone or tile. The high-gloss and realistic stone patterns look incredibly high-end.
Q: Can I install acrylic shower wall panels over my existing tile?
A: Sometimes, yes. Certain brands offer thin panels designed for this purpose. However, the existing tile must be perfectly flat, secure, and non-damaged. Any texture or unevenness in the old tile could show through or compromise the adhesive bond. For the best, most durable result, tearing out the old tile is usually recommended.
Q: How long do acrylic shower walls last?
A: With proper installation and basic care, high-quality acrylic shower wall panels can easily last 20-30 years or more without fading, yellowing, or cracking. Many top brands offer lifetime warranties, which speaks to their confidence in the product’s longevity.
Q: Is acrylic the same as fiberglass?
A: No, they are very different. Fiberglass is made by spraying a resin gel coat over a woven glass fiber mat. It’s generally thinner, more flexible, and more prone to scratching and cracking. Acrylic is a solid, uniform sheet of material that is much more durable, impact-resistant, and holds its color and finish better over time.
Q: Can you customize the size and shape?
A: Absolutely. Acrylic shower wall panels are designed to be cut on-site to fit your exact shower dimensions. They can accommodate windows, niches, and non-standard layouts, making them a very flexible solution for almost any bathroom design.
Admin Recommendation
WallPanel Home Assistant Idle: The Ultimate Guide to Smart Home Displays