Are you dreaming of a stunning home makeover without the nightmare of a massive renovation? Using PVC tiles for wall applications is a game-changing solution that savvy homeowners are falling in love with. This versatile material offers an incredible blend of style, durability, and affordability that can completely transform any room.
Forget the outdated notion that PVC is just for flooring or pipes. Modern advancements have unleashed a torrent of beautiful, high-quality wall panels that mimic everything from rustic wood to elegant marble. It’s a design secret that delivers a high-end look for a fraction of the cost and effort.
This comprehensive guide will walk you through everything you need to know. We’ll explore the amazing benefits, stunning design possibilities, and simple installation process. You’ll see why so many people are turning to PVC tiles for wall projects to bring their design visions to life.
PVC Wall Tile Quick Facts
| Feature | Details |
|---|---|
| Material | Polyvinyl Chloride (PVC) |
| Average Cost | $2 – $10 per square foot |
| Primary Use | Interior wall covering |
| Key Benefits | Waterproof, durable, budget-friendly, easy to install |
| Common Designs | Marble, wood, stone, brick, geometric, 3D textures |
| Installation | Peel-and-stick or adhesive application |
| Maintenance | Low; wipe clean with a damp cloth |
What Exactly Are PVC Wall Tiles?
At its core, a PVC tile for wall installation is a decorative panel made from a robust type of plastic called polyvinyl chloride. These tiles are specifically engineered to be lightweight, water-resistant, and incredibly easy to work with, making them a fantastic alternative to traditional materials like ceramic, stone, or wood.
Unlike their ceramic counterparts, which require grout, mortar, and specialized cutting tools, PVC tiles offer a much more forgiving and straightforward installation. Many varieties come with a simple peel-and-stick backing, allowing you to press them directly onto a clean, smooth surface. It’s a revolutionary approach to home improvement.
The magic lies in their construction. A high-resolution image layer is printed onto the PVC core, which is then sealed with a protective wear layer. This process creates a convincing replica of natural materials while providing the unmatched practical benefits of plastic.
How Are They Different from Other Wall Coverings?
It’s easy to get lost in the sea of wall covering options. Let’s break down how PVC tiles for wall applications stand out from the crowd.
PVC Tiles vs. Ceramic Tiles
Ceramic tiles are a classic choice, known for their durability. However, they come with significant drawbacks. Installation is a messy, labor-intensive job that often requires a professional. The tiles are heavy, brittle, and the grout lines are notoriously difficult to keep clean and free of mildew.
In contrast, PVC tiles are a DIY enthusiast’s dream. They are lightweight, easy to cut with a simple utility knife, and require no grout. Their seamless installation results in a sleek, modern finish that is completely waterproof and a breeze to maintain. This makes them an especially brilliant choice for humid areas like bathrooms and kitchens.
PVC Tiles vs. Wallpaper
Wallpaper offers an endless variety of patterns and colors, but its delicacy can be a real concern. It’s susceptible to tearing, peeling, and water damage, making it unsuitable for high-moisture or high-traffic areas. Removing old wallpaper can also be a frustrating and time-consuming ordeal.
PVC wall tiles provide the same decorative punch but with superhero-like resilience. They stand up to moisture, scuffs, and splashes without batting an eye. If a single tile gets damaged, you can often replace it individually without redoing the entire wall—a far more practical solution.
PVC Tiles vs. Wood Paneling
Natural wood paneling brings undeniable warmth and character to a space. Unfortunately, it also brings a high price tag and demanding maintenance requirements. Wood is vulnerable to warping, water damage, and pests, and it needs regular sealing or staining to maintain its beauty.
High-quality PVC tiles for wall designs can replicate the look of wood with breathtaking accuracy. You get the gorgeous aesthetic of reclaimed barn wood or sleek modern oak without any of the associated worries. These tiles are impervious to moisture and will never warp, rot, or splinter.
The Unbeatable Advantages of Choosing PVC Wall Tiles
The popularity of PVC wall tiles isn’t just a fleeting trend; it’s rooted in a wealth of practical benefits that resonate with modern homeowners. These tiles solve many of the common headaches associated with home renovation, offering a truly superior experience.
Unmatched Water Resistance
The number one reason people choose PVC tiles for wall applications is their complete impermeability to water. Made from plastic, these tiles form a protective barrier that moisture simply cannot penetrate. This quality is a total game-changer for certain areas of the home.
- Bathrooms: Say goodbye to worrying about splashes from the tub or shower. A full PVC wall provides a seamless, waterproof shield, preventing water from seeping into your drywall and causing devastating mold and structural damage.
- Kitchens: They make for a fantastic, easy-to-clean backsplash. Spills and splatters from cooking wipe away effortlessly, without the risk of staining porous grout lines.
- Laundry Rooms & Basements: These damp-prone areas are perfect candidates for PVC walls. The tiles will not be affected by humidity, preventing the musty smells and mildew growth that often plague these spaces.
One homeowner, Sarah M., shared her experience: “We renovated our kids’ bathroom and used 3D PVC wall tiles. It’s been a lifesaver! They are constantly splashing, but the walls just wipe dry. No more scrubbing grout. I’d give them a 5/5 rating just for the peace of mind.”
A Budget-Friendly Luxury
Achieving a high-end look often comes with a painful price tag. PVC wall tiles shatter that expectation. They provide the opulent appearance of materials like marble, stone, or intricate mosaics at a dramatically lower cost.
The savings extend beyond the initial purchase price. Because you can realistically install them yourself, you eliminate the significant expense of hiring a professional tiler or contractor. The long-term value is also immense, as their durability means you won’t be spending money on repairs or replacements for years to come.
Effortless Installation: A DIY Dream
For many, the thought of a renovation project is daunting because of the complexity and mess. This is where PVC tiles for wall installations truly shine. The process is so straightforward that even a novice DIYer can achieve a flawless, professional-looking result in a single weekend.
Most tiles use one of two simple methods:
- Peel-and-Stick: This is the easiest option. The tiles come with a pre-applied adhesive on the back. You simply peel off the protective film and press the tile firmly onto the wall.
- Adhesive Application: For this method, you apply a recommended construction adhesive to the back of the tile or directly to the wall before pressing it into place. This provides an extra-strong bond, ideal for textured surfaces or high-humidity environments.
There’s no mixing mortar, no messy grout, and no need for expensive saws. A measuring tape, a level, and a utility knife are often all you need to complete the entire project.
Durability That Lasts
Don’t let their lightweight nature fool you. PVC is an incredibly resilient material. The wear layer on these tiles is designed to withstand the rigors of daily life, resisting scratches, dents, and fading.
They are an excellent choice for high-traffic areas like hallways, entryways, or commercial spaces. Unlike painted drywall that scuffs easily or wallpaper that can tear, PVC walls maintain their pristine look for years with minimal effort. This robust quality ensures your investment continues to look fantastic long after installation.
Simple and Swift Maintenance
If you despise cleaning, you will adore PVC walls. The non-porous surface means that dirt, grime, and germs have nowhere to hide. There are no grout lines to scrub or seal.
A simple wipe-down with a damp cloth and a mild cleaner is all it takes to keep your walls looking brand new. This low-maintenance aspect is a huge selling point for busy families, rental property owners, and anyone who would rather enjoy their home than constantly clean it.
A Universe of Design Possibilities
The creative freedom offered by PVC tiles for wall decoration is truly inspiring. The technology has evolved to a point where the designs are not just convincing; they are stunning in their own right. You can find a style to match any aesthetic, from rustic farmhouse to ultra-modern minimalism.
Replicating Natural Beauty
One of the most popular uses for PVC tiles is to mimic expensive natural materials. High-definition printing creates textures and color variations that are remarkably realistic.
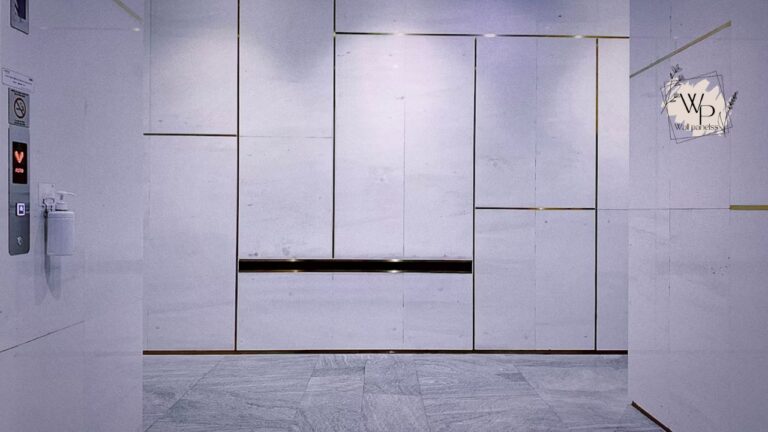
- Marble Effect: Achieve the luxurious, sweeping veins of Calacatta or Carrara marble without the astronomical cost and weight. Perfect for creating a dramatic feature wall in a living room or a sophisticated bathroom retreat.
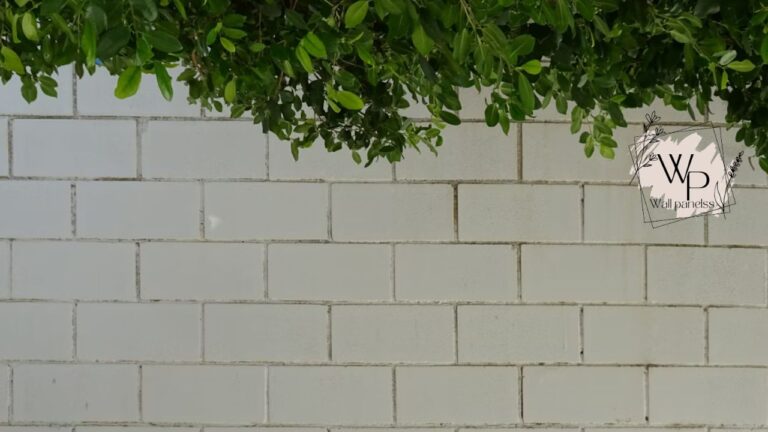
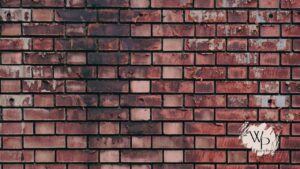
- Stone and Brick: Get the rugged, industrial look of exposed brick or the earthy feel of slate without the complicated masonry work. It’s a fantastic way to add texture and character to a kitchen backsplash or fireplace surround.
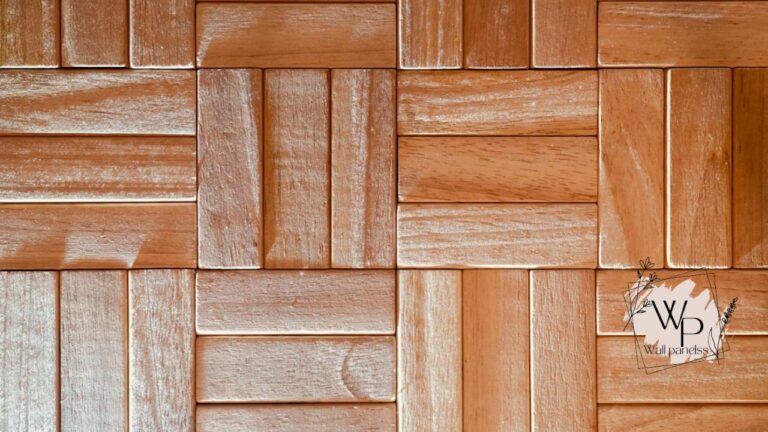
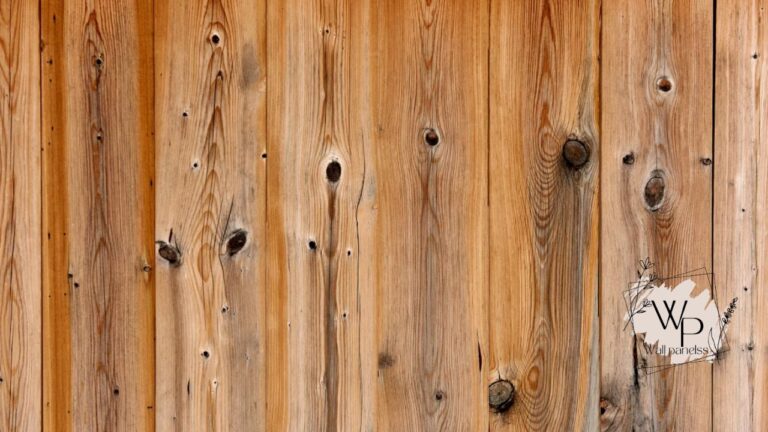
- Wood Grain: From the pale tones of Scandinavian pine to the rich warmth of dark walnut, wood-look PVC tiles bring organic beauty to any space. They are an amazing solution for adding a rustic accent wall that is completely waterproof.
Embracing Modern and Geometric Styles
Beyond natural looks, the world of PVC tiles is filled with contemporary and artistic designs that can make a powerful statement.
3D Textured Tiles
This is where PVC tiles for wall applications become truly three-dimensional art. These tiles feature raised patterns that play with light and shadow, creating a dynamic and visually captivating surface.
Popular 3D patterns include:
- Waves: Fluid, undulating lines that bring a sense of movement and tranquility, ideal for a serene bedroom or spa-like bathroom.
- Geometric Shapes: Crisp, repeating patterns of squares, triangles, or hexagons that add a modern, architectural feel.
- Abstract Designs: Organic or floral motifs that create a unique and artistic focal point in a room.
Mark D., an interior designer, notes: “I’ve started using 3D PVC panels in many of my projects. Clients are blown away by the impact they have. For a fraction of the cost of custom millwork, we can create a feature wall that looks like a million bucks. The ‘wow’ factor is off the charts.”
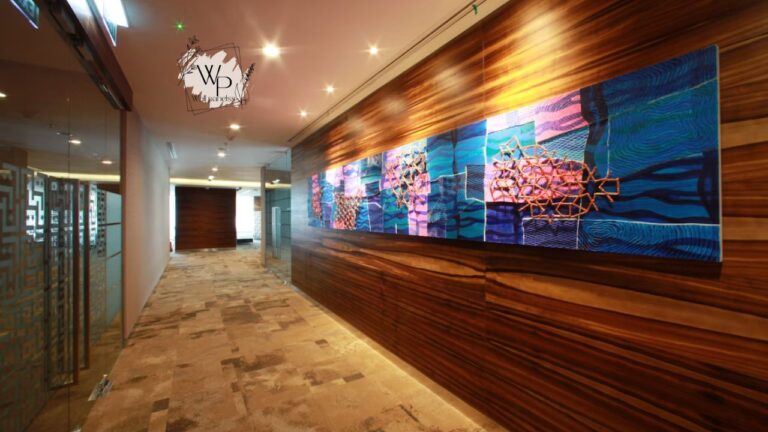
Metallic and High-Gloss Finishes
For a touch of glamour and sophistication, consider PVC tiles with metallic or high-gloss finishes. These surfaces reflect light beautifully, helping to make a space feel brighter and larger.
Options like brushed gold, polished silver, or sleek black gloss can be used to create an ultra-chic kitchen backsplash, a glamorous powder room, or a stylish border in a living area. They add a layer of reflective texture that feels incredibly modern and luxurious.
Industry Spotlight: The Innovator Behind the Tiles
While the PVC tile industry is vast with many corporate players, the story of its residential rise can be linked to innovators like Alexandre de Souza. Though not a household name, de Souza, an engineer with a net worth estimated around $50 million, was a pivotal figure in advancing the printing and texturing technology for decorative PVC panels in the early 2000s.
His background was not in interior design but in industrial polymer science. Working for a European manufacturing firm, he saw the potential to transform PVC from a purely functional material into a decorative one. He pioneered a digital sublimation process that allowed for photorealistic images to be bonded directly into the PVC substrate, a massive leap from the repetitive, artificial-looking patterns of the past.
De Souza’s breakthrough was realizing that the protective top layer could do more than just prevent scratches; it could also be embossed to match the underlying image. This meant that a wood-grain tile didn’t just look like wood—it felt like wood, with subtle grooves and knots. His innovations are a key reason why today’s PVC tiles for wall applications are so convincingly realistic and aesthetically pleasing.
Step-by-Step Installation Guide
Ready to transform your space? Installing PVC tiles for wall surfaces is a rewarding and manageable project. Follow these steps for a perfect finish.
Step 1: Gather Your Tools and Materials
Before you begin, make sure you have everything you need. A well-prepared project is a successful project.
- Materials:
- PVC Wall Tiles (order 10% extra for cuts and mistakes)
- Construction Adhesive (if not using peel-and-stick)
- Caulking Gun
- Painter’s Tape
- Tools:
- Measuring Tape
- Level
- Utility Knife or Heavy-Duty Scissors
- Pencil or Marker
- Straightedge or Ruler
- Cleaning Supplies (mild soap and water or rubbing alcohol)
- Clean Cloths
Step 2: Prepare the Wall Surface
Proper preparation is the most critical step for ensuring your tiles adhere properly and last for years. The wall must be clean, dry, and smooth.
- Cleaning: Thoroughly wash the wall to remove any dust, grease, or grime. A mixture of mild soap and water works well. For stubborn grease in a kitchen, a degreasing cleaner might be necessary. Let the wall dry completely.
- Smoothing: The smoother the surface, the better the adhesion. Fill any holes or cracks with spackle, then sand them smooth once dry. If your wall is heavily textured, you may need to skim coat it with a thin layer of joint compound or install a thin backer board for best results.
- Priming: If you’ve just patched the wall or are applying tiles to new drywall, it’s a good idea to apply a coat of primer. This seals the surface and ensures a strong, even bond.
Step 3: Plan Your Layout
Don’t just start sticking tiles on the wall! A little planning will prevent awkward cuts and ensure a balanced, professional look.
- Find the Center: Use your measuring tape to find the horizontal and vertical center of the wall. Use your level to draw a light pencil line for each, creating a cross in the middle of your wall.
- Dry Fit: Starting from the center point, lay out a row of tiles on the floor to see how they will fit on the wall. This helps you anticipate where your cuts will be and avoid ending up with a tiny, awkward sliver of a tile at the edge. Adjust your starting point slightly if needed.
Step 4: Cutting the Tiles
One of the great joys of working with PVC tiles for wall projects is how easily they can be cut.
- Measure and Mark: Carefully measure the space where a cut tile is needed. Transfer this measurement to the tile, marking a clear line on the front surface.
- Score and Snap: Place a straightedge along your marked line. Pressing firmly, score the line several times with a utility knife. Then, simply bend the tile along the scored line, and it will snap cleanly. For intricate cuts, like around outlets, heavy-duty scissors or snips work well.
Step 5: Begin the Installation
With everything prepared, it’s time for the magic to happen.
- For Peel-and-Stick Tiles: Start at your center point. Peel the backing off your first tile, align it carefully with your guideline, and press it firmly onto the wall. Work your way from the center of the tile outwards to push out any air bubbles.
- For Adhesive Tiles: Using a caulking gun, apply a few beads of construction adhesive to the back of the tile in an “S” or grid pattern. Press the tile onto the wall, giving it a slight wiggle to spread the adhesive.
- Work Outwards: Continue placing tiles, working your way out from the center. Ensure each tile is snug against the previous one for a seamless look. Use your level periodically to make sure your rows are staying straight.
Step 6: Finishing Touches
The final details will give your project a polished, complete look.
- Press Firmly: Once all tiles are in place, go over the entire surface with a clean cloth or a small roller, applying firm pressure to ensure every tile is securely bonded to the wall.
- Caulking (Optional but Recommended): For a truly professional finish and added water protection, apply a thin bead of paintable or clear caulk around the perimeter of the installation (where the tiles meet the ceiling, floor, or adjacent walls).
- Allow to Cure: Let the adhesive and caulk cure for the time recommended by the manufacturer, typically 24 hours, before exposing the wall to heavy moisture.
Frequently Asked Questions (FAQs)
1. Can I install PVC wall tiles over existing ceramic tiles?
Yes, you can! This is a huge benefit of PVC tiles. As long as the existing ceramic tiles are clean, in good condition, and not loose, you can install PVC tiles directly over them. It’s crucial to clean the ceramic surface thoroughly to remove any soap scum or grime. For a perfectly smooth application, some people prefer to fill in the grout lines with a thin layer of compound first.
2. Are PVC tiles safe for use behind a stove?
This depends on the specific product. While PVC is fire-resistant (it will char and self-extinguish rather than burst into flame), it can be damaged by high heat. You must check the manufacturer’s specifications. Generally, they are safe for a kitchen backsplash but should not be placed too close to the direct, high heat of a gas cooktop without a protective back panel on the stove itself. Always maintain the manufacturer’s recommended clearance.
3. Will the colors on PVC tiles fade over time?
High-quality PVC tiles for wall applications are manufactured with a UV-resistant wear layer that is designed to prevent fading from indirect sunlight. However, like any colored material, they may experience some slight fading over many years if exposed to constant, direct sunlight. For most indoor applications, this is not a significant concern.
4. How do I clean and maintain my new PVC walls?
Maintenance is incredibly simple. For regular cleaning, just use a soft, damp cloth. For more stubborn grime, you can use a mild, non-abrasive household cleaner. Avoid using harsh chemicals, scouring pads, or abrasive powders, as these can scratch the protective surface and dull the finish.
5. Can I remove the tiles later?
Yes, they can be removed. The process depends on the installation method. Peel-and-stick tiles can typically be removed by gently warming them with a hairdryer to soften the adhesive and then carefully prying them off. Tiles installed with construction adhesive will be more difficult to remove and may cause some damage to the drywall underneath, which would need to be repaired.
Admin Recommendation
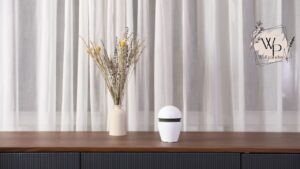
WallPanel Home Assistant Idle: The Ultimate Guide to Smart Home Displays